Monday, April 16, 2018

Simple CRUD app using REST api part - 1


  • What is REST?

    • Best thing ever. makes developers life much easier.
    • REST means Representational State Transfer 
    • You can simply make a CRUD app using this.
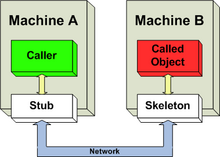
    REST API Architecture


    • Client makes HTTP requests to the API
    • API handles Routes,Business Logic
    • Sends and retrieve data from the database.
    • This is simple, scalable and reliable.


  • We are going to make a simple REST app using Node Express framework and MongoDB.
  • First you have follow these and setup the project.
  1. First you have setup node and create a project. I have explained this in my Node.js for dummies post.
  2. Then you have to setup MonogoDB and keep it running. I have explained this in my MongoDB for dummies post
  3. You need a postman app for testing HTTP requests. Download  it from  here.
  4. And you need Robo 3T app for MongoDB GUI supporter. Thank me later for this Robo 3T.

  • Now lets get our hands dirty,


  • First we add express frame work to our project
npm install express --save

  • this --save adds the dependency or "external resources" to package.json file in the project.
Now we can start development,

  • First thing to be done is import the dependency, by requiring it on the top of the project. otherwise we cannot use express.
const express=require('express');
  • I declare it as constant, because this variable should be declared only once.
  • Then i create an instance of the app.
const app=express();

  • And now app contains all the properties functions of an express app.


{ [EventEmitter: app]
  domain: undefined,
  _events: { mount: [Function: onmount] },
  _maxListeners: undefined,
  setMaxListeners: [Function: setMaxListeners],
  getMaxListeners: [Function: getMaxListeners],
  emit: [Function: emit],
  addListener: [Function: addListener],
  on: [Function: addListener],
  prependListener: [Function: prependListener],
  once: [Function: once],
  prependOnceListener: [Function: prependOnceListener],
  removeListener: [Function: removeListener],
  removeAllListeners: [Function: removeAllListeners],
  listeners: [Function: listeners],
  listenerCount: [Function: listenerCount],
  eventNames: [Function: eventNames],
  init: [Function: init],
  defaultConfiguration: [Function: defaultConfiguration],
  lazyrouter: [Function: lazyrouter],
  handle: [Function: handle],
  use: [Function: use],
  route: [Function: route],
  engine: [Function: engine],
  param: [Function: param],
  set: [Function: set],
  path: [Function: path],
  enabled: [Function: enabled],
  disabled: [Function: disabled],
  enable: [Function: enable],
  disable: [Function: disable],
  acl: [Function],
  bind: [Function],
  checkout: [Function],
  connect: [Function],
  copy: [Function],
  delete: [Function],
  get: [Function],
  head: [Function],
  link: [Function],
  lock: [Function],
  'm-search': [Function],
  merge: [Function],
  mkactivity: [Function],
  mkcalendar: [Function],
  mkcol: [Function],
  move: [Function],
  notify: [Function],
  options: [Function],
  patch: [Function],
  post: [Function],
  propfind: [Function],
  proppatch: [Function],
  purge: [Function],
  put: [Function],
  rebind: [Function],
  report: [Function],
  search: [Function],
  subscribe: [Function],
  trace: [Function],
  unbind: [Function],
  unlink: [Function],
  unlock: [Function],
  unsubscribe: [Function],
  all: [Function: all],
  del: [Function],
  render: [Function: render],
  listen: [Function: listen],
  request: IncomingMessage { app: [Circular] },
  response: ServerResponse { app: [Circular] },
  cache: {},
  engines: {},
  settings:
   { 'x-powered-by': true,
     etag: 'weak',
     'etag fn': [Function: generateETag],
     env: 'development',
     'query parser': 'extended',
     'query parser fn': [Function: parseExtendedQueryString],
     'subdomain offset': 2,
     'trust proxy': false,
     'trust proxy fn': [Function: trustNone],
     view: [Function: View],
     views: 'F:\\Projects\\Node\\REST-app1\\views',
     'jsonp callback name': 'callback' },
  _eventsCount: 1,
  locals:
   { settings:
      { 'x-powered-by': true,
        etag: 'weak',
        'etag fn': [Function: generateETag],
        env: 'development',
        'query parser': 'extended',
        'query parser fn': [Function: parseExtendedQueryString],
        'subdomain offset': 2,
        'trust proxy': false,
        'trust proxy fn': [Function: trustNone],
        view: [Function: View],
        views: 'F:\\Projects\\Node\\REST-app1\\views',
        'jsonp callback name': 'callback' } },
  mountpath: '/' }


  • You can see it all. Don't get confused. Only for GEEKS.

  • Now we have setup our app.
  • We have to listen to incoming requests on a port.
  • But how do we listen to incoming requests.
app.listen(process.env.port||3000,function () {
console.log("listeing on port 3000");
});


  • This  code does that for us. the process.env.port||3000
  • This tell us to listen on port 3000 or port on the web server environment that the app can listen to requests.


Wednesday, March 28, 2018

MongoDB for dummies


MongoDB WTF?????


  • Most important word NOSQL.
  • This doesn't mean as the same, it means that not only SQL.
  • Distribution , Horizontal scalability and Easy replication is prominent when comes to NOSQL.
  • NOSQL databases helped for the rise of Big data, Machine Learning technologies.

  •  MongoDB records are called documents.
  •  Each MongoDB database (You can have many.) includes collections, which are a set of JSON documents.
  •  Each collection and document has an ObjectID created by MongoDB or supplied by the programmer.
  • For SQLees or "SQL people",
    • Table is like a collection
    • Row/Record is like a document
    • No keys PK,FK

  • For installation refer this

  • Create a database
use Products
switched to db Products
  • Create a collection
db.createCollection("users")


    • Insert an item
    db.users.insert([
    {
        name:"John",
        email:"john@gmail.com"
    }
    ])

      Here the items are added in object form. To many more than one item an array can be used.

      • To Select results from db use,
        • db.getCollection('users').find({})


      /* 1 */
      {
          "_id" : ObjectId("5ae6b03fd26140c6db274889"),
          "name" : "bandula",
          "email" : "asdsa@gmail.com"
      }

      /* 2 */
      {
          "_id" : ObjectId("5ae6b099d26140c6db274892"),
          "name" : "John",
          "email" : "john@gmail.com"
      }

      • For querying parameter can be passed as objects
        • db.getCollection('users').find({name:"bandula"})
      /* 1 */
      {
          "_id" : ObjectId("5ae6b03fd26140c6db274889"),
          "name" : "bandula",
          "email" : "asdsa@gmail.com"
      }

      • Remove a document 
        • db.getCollection('users').remove({name:"john"})
      condition to be checked for the removal is passed as object
      • Update a document
        • db.getCollection('users').updateOne({name:"bandula"},{$set:{email:"bandula@hotmail.com"}})
      condition to be checked, updating parameters are passed. updating parameters are passed in the $set object 


      Wednesday, March 7, 2018

      Java Remote Method Invocation for absolute beginners


      • Java RMI is a method which helps you to run applications which are located in remote server. "simply said you can run a system which is not in your computer may be friends computer using this method".

      • May be hackers might do this this things,they can install a application in your computer and they can control your computer using this method.


      • In both machines JVM is required. No way you can run java without JVM, so this is a must.

      • Oldest method to implement this was stub skeleton model.


      • Stub and skeleton are like proxies or intermediary part which convert method definitions variable method calls etc. to byte streams.

      • This how RMI works.

                   1.Client requests for the remote object reference to naming service
                   2.Once the naming service locates the server host, RMI registry provides a stub (proxy) of                  remote object.
                  3.Client can make call using the stub
                  4.Basically, the request from the stub is sent to the server skeleton which makes the actual                request to the remote object.
                  5.Similarly, the server response is sent back through skeleton and stub to the client.


      • Java implementation of this is as follows,

        1. Make a Remote Interface
          • an interface extending java Remote class
          • for both client and server.
        1. In "server" class, in this context implements the interface,creates an instance of the remote object implementation, exports the remote object, and then binds that instance to a name in a Java RMI registry
        2. Implement client 


      • This is an implementation of Temperature monitor application using RMI, here temperature values are randomly simulated using an algorithm.

      • Remote Interface of server

      /*TemperatureSensor interface extending remote interface this can be called from remote JVM*/


      interface TemperatureSensor extends java.rmi.Remote

      {

      public double getTemperature() throws //get temperature from the server

      java.rmi.RemoteException;

      public void addTemperatureListener // add a listner to listner list
      (TemperatureListener listener )
      throws java.rmi.RemoteException;
      public void removeTemperatureListener //remove listner from the list
      (TemperatureListener listener )
      throws java.rmi.RemoteException;
      }


      • Remote Interface of Client
      /* Listner interface extending remote interface this can be called from remote JVM*/


      interface TemperatureListener extends java.rmi.Remote

      {


      /*this is the callback function which server calls upon a change in temperature*/

      public void temperatureChanged(double temperature) throws java.rmi.RemoteException;
      }

      • Implementation of the server


      import java.util.*;
      import java.rmi.*;
      import java.rmi.server.*;

      /* implements the TemperatureSensor interface 
      Used for exporting a remote object with JRMP and obtaining a stub that communicates to the remote object
      and a seperate thread for the server*/

      public class TemperatureSensorServer extends UnicastRemoteObject implements
      TemperatureSensor, Runnable {

      private volatile double temp;
      private ArrayList<TemperatureListener> list = new ArrayList<TemperatureListener>();


      //contructor initiate temperature to 98;
      public TemperatureSensorServer() throws java.rmi.RemoteException {
      temp = 98.0;
      }
      //return the current temperature
      public double getTemperature() throws java.rmi.RemoteException {
      return temp;
      }
      //adds a TemperatureListener object to the list of listners
      public void addTemperatureListener(TemperatureListener listener)
      throws java.rmi.RemoteException {
      System.out.println("adding listener -" + listener);
      list.add(listener);
      }
      //remove a TemperatureListener from the list of listners
      public void removeTemperatureListener(TemperatureListener listener)
      throws java.rmi.RemoteException {
      System.out.println("removing listener -" + listener);
      list.remove(listener);
      }

      public void run() {
      Random r = new Random();
      for (;;) {
      try {
      // Sleep for a random amount of time
      int duration = r.nextInt() % 10000 + 200;
      // Check to see if negative, if so, reverse
      if (duration < 0) {
      duration = duration * -1;
      Thread.sleep(duration);
      }
      } catch (InterruptedException ie) {
      }

      // Get a number, to see if temp goes up or down
      int num = r.nextInt();
      if (num < 0) {
      temp += 0.5;
      } else {
      temp -= 0.5;
      }

      // Notify registered listeners

      try{

      System.out.println(String.valueOf(temp));

      notifyListeners();
      }

      catch(Exception e){

      }
      }
      }

      private void notifyListeners() {
      // TO DO: Notify every listener in the registered list if there is a change in the temperature

      for (TemperatureListener tl : list) {


      try{
      double temperature=getTemperature();
      tl.temperatureChanged(temperature);
      }
      catch(Exception e){

      }
      }

      }

      here the binding of server object to the RMI registry happen

      public static void main(String[] args) {
      System.out.println("Loading temperature service");

      try {

      //bind TemperatureSensorServer to RMI registry from which the client can get a reference of service

      TemperatureSensorServer sensor = new TemperatureSensorServer();
      String registry = "localhost";

      String registration = "rmi://" + registry + "/TemperatureSensor";

      Naming.rebind(registration, sensor);

      Thread thread = new Thread(sensor);
      thread.start();
      } catch (RemoteException re) {
      System.err.println("Remote Error - " + re);
      } catch (Exception e) {
      System.err.println("Error - " + e);
      }

      }

      }


      • Then the client implementation


      import java.rmi.*;

      import java.rmi.server.*;
      import java.net.*;
      import java.io.Serializable;
      /*this class implements the TemperatureListner interface 
      Used for exporting a remote object with JRMP and obtaining a stub that communicates to the remote object and a sperate thread for each client*/

      public class TemperatureMonitor extends UnicastRemoteObject implements
      TemperatureListener, Runnable,Serializable  {

      private int count = 0;

      public TemperatureMonitor() throws RemoteException {
      }

      public static void main(String[] args) {

      try {
      String registration = "//localhost/TemperatureSensor";

      //lookup for the interface object in RMI registry and get the reference to the object

      Remote remoteService = Naming.lookup(registration);
      TemperatureSensor sensor = (TemperatureSensor) remoteService;
      double reading = sensor.getTemperature();
      System.out.println("Original temp : " + reading);
      TemperatureMonitor monitor = new TemperatureMonitor();

      // Add method call to register the listener in the server object
      sensor.addTemperatureListener(monitor);


      monitor.run();
      } catch (MalformedURLException mue) {
      } catch (RemoteException re) {
      } catch (NotBoundException nbe) {

      }
      }


      //callback function invoked by TemperatureSensorServer to notifiy temperature change

      public void temperatureChanged(double temperature)
      throws java.rmi.RemoteException {
      System.out.println("\nTemperature change event : " + temperature);
      count = 0;
      }

      //TemperatureMonitor thread counting until a temperature change occur
      public void run() {
      for (;;) {
      count++;

      // note that this might only work on windows console
      System.out.print("\r" + count);
      try {
      Thread.sleep(100);
      } catch (InterruptedException ie) {
      }

      }

      }
      }


      • to run this first set class path of your working directory using command prompt
                     set CLASSPATH=%CLASSPATH%;<<your directory path here>>

      • Generate the server and client stub using the command ‘rmic classname'

      • Start the rmiregistry using the command ‘start rmiregistry’.

      • java –Djava.security.poicy=allowall.policy 'classname'

      Wednesday, February 28, 2018

      Node.js for dummies


      Node.js WTF??????????????????


      • Node.js is an open-source framework
      • Node.js is a cross-platform runtime environment for developing server-side and networking applications
      • Node.js is a JavaScript runtime built on Chrome's V8 JavaScript engine
      • Node.js uses an event-driven, non-blocking I/O model that makes it lightweight and efficient.

      Installing Node.js to get started


      Check with Everything


      • To get started with Node.js, let's try it in the terminal! Start Node.js by simply typing node:

      • $ node
        >
        
        Okay, let's try printing something:
        $ node
        > console.log('hello from Node.js')
        
        Once you hit Enter, you will get something like this:
        > console.log('hello from Node.js')
        hello from Node.js
        undefined


      When Starting a new Project


      • Every Node.js project starts with creating a package.json file - you can think of it as a JSON representation of the application and its' dependencies. It contains your application's name, the author (you), and all the dependencies that is needed to run the application
      • Command to create this file is npm init and follow the instructions.
      • It will create something like this

      {
        "name": "test",
        "version": "1.0.0",
        "description": "",
        "main": "index.js",
        "scripts": {
          "test": "echo \"Error: no test specified\" && exit 1",
          "start": "node index.js"
        },
        "author": "",
        "license": "ISC"
      }


      Saturday, January 21, 2017

      BFS (Boy Friend Search)....I am kidding its --Breadth First Search--


      BFS is an graph searching algorithm.


      Graph????????

      • Has nodes (vertices)
      • Has Edges (links) -can have a value(weight)


      This is an example, Numbers show nodes and links connect
      them.

      Graphs can be directed or undirected.

      picture shows an undirected graph. you can easily identify it... no arrows in links lads......

      In directed graph ,,,
      you can guess - can be traveled among nodes only in the indicated direction


      My sample code for the BFS in python


      to_visit = [0]
      parent = {}
      level4 = []
      nodes = [0,1,2,3,4,5]
      i = 0
      while to_visit != [] and i <= len(to_visit)-1:
          front = to_visit[i]
          #del to_visit[0]
          for j in nodes:
              
              if j not in to_visit and adj[front][j] == 1:
                  to_visit.append(j)
                  parent[j]=front
          print to_visit,parent
          i+=1


      • BFS can be used to get the shortest path in the graph.
      • parent nodes of each node indicate the path


      Friday, January 20, 2017

      BeautifulSoup4 extremely beginner guide


      First you have to,


      •  Install beautifulsoup4 and requests libraries.

      pip install beautifulsoup4
      pip install requests

      • import these libraries to script
      from bs4 import BeautifulSoup
      import requests


      Now the Fun Part begins,


      • There are few step before using we should do
      • by using requests we retrieve data from a specific URL using GET Request, and the response is stored in r variable. We use requests get method for it.
      r=requests.get(url)


      • Then the content in specific response (by the way it is html content) used to create beautifulsoup  soup object. 

      soup=BeautifulSoup(r.content,"html.parser")

      html parser is optional,you know that everything in r.content is html right!!


      • Actually to do an any web scrape you would only need to know 3 keyword and that's  all.Rest is up up you.
      • Here are they,
        • findAll() function
        • .contents
        • .text

      • findAll() function 
      soupObject.findAll("element",{"property":'name'}[optional])

      this returns all the html content  having these properties in a List form.


      • .contents
      item.contents

      converts immediate child elements inside html element to a list form.


      • .text
      get the text (content visible to you in website) in html elements without any html elements.


      This is an sample example for web scraping and store data in an excel sheet.


      from bs4 import BeautifulSoup
      import requests


      def getSoupObject(url="http://www.list.com/search/home.html"):
      
          
          r=requests.get(url)
          soup=BeautifulSoup(r.content,"html.parser")
          return  soup
      
      
      def getDataFromPage(soupObj):
      
          lst=[]
      
          divCont= soupObj.findAll("div",{"class":'list_l_box'})
      
          for item in divCont:
              itemList=item.contents
      
              if itemList[1].findAll('img',{"alt":"No image"}) !=[]:
                  continue
              else:
                  companyDataList=itemList[3].contents
      
                  if companyDataList[5].findAll("span",{"itemprop":"telephone"})!=[]:
      
                      companyName=companyDataList[1].text
                      companyTele=companyDataList[5].findAll("span",{"itemprop":"telephone"})[0].text
                      temp=[]
                      temp.append(companyName)
                      temp.append(companyTele)
                      
      
                      lst.append(temp)
          return lst